Key Takeaways
- Proper wall preparation is the single most important factor — walls must be flat, clean, and dry before installation
- Three mounting methods: adhesive (best for flat walls), screw (best for heavy panels), batten system (best for uneven walls)
- Always leave 3-5mm expansion gaps between panels and at edges to accommodate natural wood movement
- Professional installation recommended for large areas; DIY-friendly for small accent walls
- Teak panels should acclimate in the installation room for 48-72 hours before mounting
Tools and Materials You Need
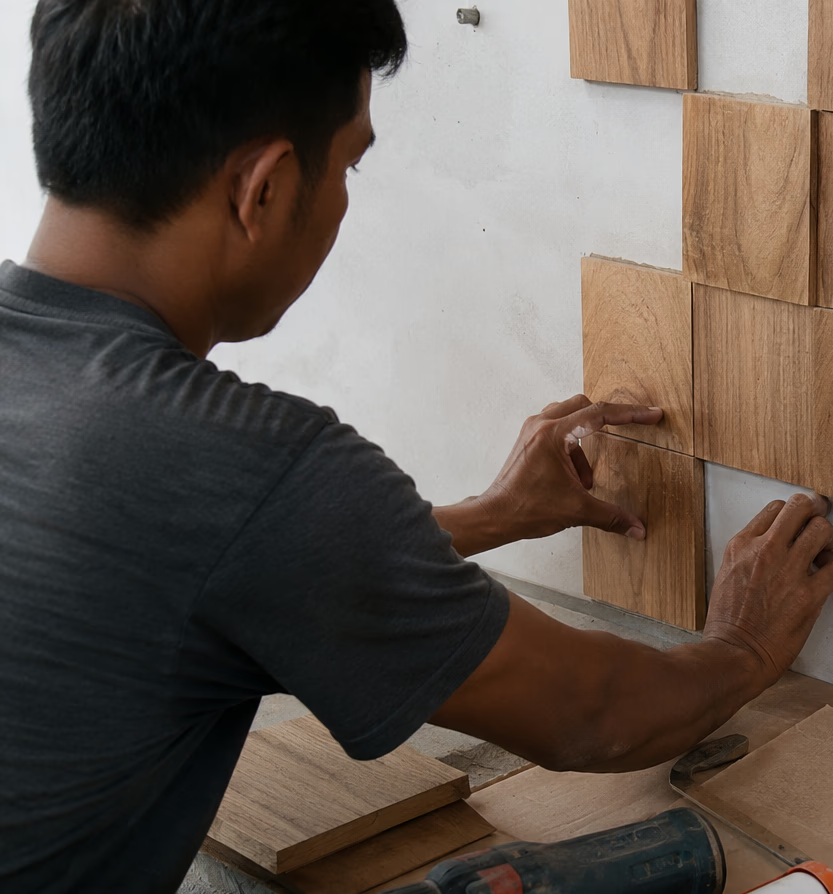
Before starting your teak wall panel installation, gather all necessary tools and materials. Having everything ready prevents delays and ensures clean, professional results.
Essential Tools
| Tool | Purpose | Notes |
|---|---|---|
| Measuring tape | Accurate wall and panel measurements | Precision to 1mm recommended |
| Level (2m minimum) | Ensure horizontal and vertical alignment | Laser level preferred for large areas |
| Pencil | Mark panel positions and cut lines | Use light marks on hidden surfaces |
| Circular saw or hand saw | Cut panels to fit | Fine-tooth blade (40+ teeth) for clean cuts |
| Clamps | Hold panels during adhesive curing | Minimum 4 clamps per panel |
| Brad nail gun | Secure panels while adhesive sets | 18-gauge brad nails recommended |
| Caulking gun | Apply adhesive evenly | Heavy-duty for thick adhesives |
| Sandpaper (120-180 grit) | Smooth cut edges | Match grain direction when sanding |
Materials
| Material | Purpose | Recommended Products |
|---|---|---|
| Construction adhesive | Primary bonding method | PL Premium, Loctite Power Grab |
| Wood screws | Secondary fastening | Stainless steel, 30-40mm length |
| Wood filler | Conceal screw heads | Teak-colored wood filler |
| Expansion spacers | Maintain gaps between panels | 3-5mm plastic spacers |
| Wood sealant | Edge finishing (optional) | Teak-specific sealant |
Wall Preparation: The Foundation
Wall preparation determines installation success. Skipping this step causes panel misalignment, adhesive failure, and long-term performance issues.
Step 1: Inspect Wall Surface
Check for:
- Flatness: Use 2m level to identify high/low spots. Maximum tolerance: 3mm over 2m
- Moisture: Use moisture meter. Wall moisture must be below 12%
- Structural integrity: Walls must support panel weight (typically 8-15 kg/m²)
- Cleanliness: Remove dust, grease, old paint, and loose material
Step 2: Repair and Prime
Fill holes and cracks with appropriate filler. Sand smooth. Apply primer if wall is porous (drywall, plaster). Allow 24 hours drying time.
Step 3: Mark Reference Lines
Use level to mark horizontal and vertical reference lines. These guide panel placement and ensure perfect alignment.
Installation Method 1: Adhesive Mounting
Best for: Flat, smooth walls (concrete, plastered brick, drywall with backing)
Adhesive mounting provides invisible fastening and clean aesthetics. This is the preferred method for most residential and commercial installations.
Step-by-Step Process
- Apply adhesive: Apply construction adhesive to panel back in zigzag pattern, 20-30mm from edges
- Position panel: Press panel firmly against wall, aligning with reference lines
- Secure temporarily: Use brad nails at 450mm intervals along top edge (nails hidden by ceiling trim)
- Check alignment: Use level to verify horizontal and vertical position
- Insert spacers: Place 3-5mm spacers between panels and at edges
- Cure time: Allow 24-48 hours before removing clamps/braces
Pros and Cons
| Pros | Cons |
|---|---|
| Invisible fastening | Difficult to remove without damage |
| Quick installation | Requires flat wall surface |
| No visible screw heads | Adhesive quality critical |
| Even load distribution | Cure time required |
Installation Method 2: Screw Mounting
Best for: Heavy panels, commercial installations, areas requiring future removal
Screw mounting provides maximum holding power and allows panel removal if needed.
Step-by-Step Process
- Pre-drill holes: Drill 3mm pilot holes at 400mm intervals along panel edges
- Position panel: Hold panel against wall, aligning with reference lines
- Drive screws: Drive stainless steel screws through pre-drilled holes into wall studs or anchors
- Conceal heads: Fill screw heads with teak-colored wood filler
- Sand flush: Sand filled areas flush with panel surface
- Finish: Apply matching finish to concealed areas
Pros and Cons
| Pros | Cons |
|---|---|
| Maximum holding power | Visible screw heads (concealed with filler) |
| Allows future removal | Requires wall studs or anchors |
| No cure time required | More labor-intensive |
| Works on uneven walls | Pre-drilling required |
Installation Method 3: Batten System
Best for: Uneven walls, ventilation requirements, hidden wiring/lighting
The batten system creates a gap between wall and panel, allowing air circulation and concealment of wiring.
Step-by-Step Process
- Install battens: Mount vertical wood battens (25x50mm) at 400mm intervals
- Level battens: Ensure all battens are plumb and level
- Route wiring: Run electrical or data cables behind battens if needed
- Attach panels: Screw panels to battens from front (concealed by filler) or from edges
- Finish: Fill and sand screw heads
Pros and Cons
| Pros | Cons |
|---|---|
| Allows air circulation | Requires more wall depth (25-50mm) | Conceals wiring/lighting | More materials and labor |
| Works on uneven walls | Additional weight on wall |
| Easy panel replacement | Professional installation recommended |
Tips for Perfect Alignment
Professional installers follow these techniques for flawless results:
- Start from center: Begin installation at wall center, working outward for symmetrical layout
- Use reference lines: Maintain horizontal and vertical reference lines throughout installation
- Check every panel: Verify level and plumb after each panel installation
- Maintain expansion gaps: Use 3-5mm spacers consistently — teak expands/contracts with humidity
- Acclimate panels: Allow 48-72 hours for panels to adjust to room temperature and humidity
Common Mistakes to Avoid
| Mistake | Consequence | Solution |
|---|---|---|
| Skip wall preparation | Adhesive failure, panel movement | Always inspect and prepare walls first |
| No expansion gaps | Panel buckling, joint separation | Use 3-5mm spacers consistently |
| Wrong adhesive type | Poor bonding, panel detachment | Use construction adhesive rated for wood |
| Rush installation | Misalignment, visible gaps | Check level after every panel |
| Ignore acclimation | Post-installation movement | Acclimate 48-72 hours before installation |
FAQ
Can I install teak wall panels myself?
Small accent walls are DIY-friendly with basic tools. Large areas or complex layouts benefit from professional installation for perfect alignment and long-term performance.
How long does teak wall panel installation take?
A typical accent wall (5-10 m²) takes 1-2 days including preparation. Larger installations may take 3-5 days depending on complexity.
What adhesive should I use for teak panels?
Use heavy-duty construction adhesive rated for wood bonding (PL Premium, Loctite Power Grab). Avoid silicone-based adhesives — they remain flexible and may allow panel movement.
Do I need to seal teak wall panels after installation?
Sealing is optional. Teak's natural oils provide inherent protection. Sealing enhances color and adds surface protection but is not required for performance.
How do I cut teak panels to fit?
Use a circular saw with fine-tooth blade (40+ teeth) or hand saw. Sand cut edges with 120-180 grit sandpaper to match factory finish.
What is the best installation method for bathrooms?
Adhesive mounting is recommended for bathroom installations — it provides invisible fastening and eliminates screw holes that could allow moisture penetration.
Need Installation Support?
Our technical team provides installation guidance for all teak panel projects. Contact us for project-specific recommendations.